Introducing our unique method for creating paper crafts!
On this website, you’ll find a variety of ideas to draw coloring patterns using square and triangle grids geometry. While drawing is one way to explore geometric patterns and enjoy geometric art, another is to build objects that follow the same underlying principles. Intruducing a new series of projects where we build objects out of recycled paper. These projects use our unique, unit-origami inspired crat for creating flat and 3D paper models from recycled materials. Make these projects as decorataions, uniqe gifts or just for the pure joy of creativity.
What is unit or modular origamy?
According to Wikipedia, “Modular origami or unit origami is a multi-stage paper folding technique in which several, or sometimes many, sheets of paper are first folded into individual modules or units and then assembled into an integrated flat shape or three-dimensional structure.”
How’s our metod similar and different?
Similarly, our method involves assembling structures from individual pieces. However, instead of folding sheets of paper, we create our units from leftover paper materials—such as empty toilet paper rolls, kitchen towel rolls, tissue boxes, and other paper packaging.
Why use recycled paper materials?
Using recycled paper sources gives us practically unlimited material, offers a second life to carton that would otherwise be discarded, and helps us appreciate the creative possibilities and overlooked value of everyday waste. It also challenges us to use our curiosity, creativity and ingenuity to see hidden potential, innovate within given shape and size constraints, and transform the trash into a beautiful treasure.
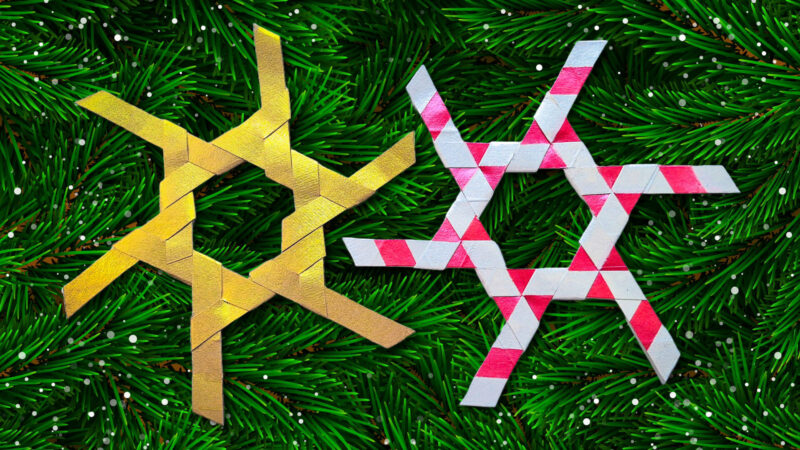
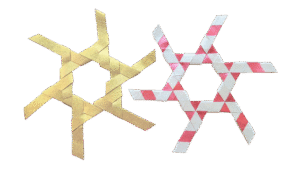
Start with Hexagon Star 1, a simple flat model that will give you a first experience with this method before we move on to more complex designs.
Process
Tools and Materials
For this project, you’ll need simple materials—most of them easily found at home:
- Required
- 4 empty toilet paper rolls (each roll makes 4 pieces; we need 12 pieces total for a single model)
- Alternative paper sources: a Kitchen Towel Roll (makes about 18 pieces)
- For larger models: 2 tissue paper boxes (makes about 16 pieces)
- Protractor, Pencil, and Ruler
- Large Sharp Scissors able to cut thick carton
- Recommended
- Guillotine Paper Cutter for the best experience and straight, sharp edges
- Scoring/Creasing tool or Letter opener (tip of a nail file works great as well, this is optional but we prefer scoring as it does not leave any pencil marks)
- Electric Iron with steamer (very helpful for flattening, plus it takes care of any hygiene concerns regarding working with toilet paper rolls)
- Metallic Acrylic Paint and Paint Brushes
- Masking Tape (required for multi color versions)
- Non-stick parchment paper (if ironing already painted paper rolls to protect the paint and the iron)
Preparing and Cutting the Pieces
- Start by flattening each toilet paper roll using a hot iron to create an even surface.
- For painted and multicolor models, it’s easier to paint the paper rolls if they are in its original form. Let fully dry before flattening.
- Place the flattened roll on your working surface horizontally, so the long, straight edges run left to right.
- Using a protractor, mark a 60-degree angle line extending downward to the bottom edge. Measure the length of this angled line—from the top edge to the bottom edge—and divide it by 5. This gives you the width of each piece.
- Mark the width calculated in the previouis step along both the top and bottom edges of the roll. Use a ruler to connect the corresponding marks, creating five angled strips.
- Cut along these lines to get individual pieces. Each roll yields about 4 pieces, and you’ll need 12 pieces total for a single model.
- Each cut piece will form a loop, since it’s made from a section of the original cylindrical roll. This looped shape is essential—it allows us to build the model by nesting each loop inside the next, without the need for glue or connectors.
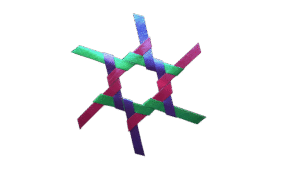
Assembly – Hexagon Star 1
- Start with 3 peices and interlock them by placing one over another. Tighten to create a triangular interlock
- Place the next piece over any open end and again, finish of with the another piece to create another traingular interlock.
- Continute interlocking the pieces until a hexagon shape opening is formed and all 12 pieces are used.
- See visual instruction in the above video
Hexagon Star 1 – Design Ideas
Hexagon Star 2

- Step 1 (see below): Start by assembling 6 pieces into a hexagon shaped opening
- Step 2 (see below): Place the next piece over any of the open ends
- Step 3 (see below): Before closing the triangle shape, place another piece over the next open end, then insert the piece added in Step 2 inside the next open end piece to close the triangle shape opening.
- Continue the process with the rest of the pieces until the rest of the 12 pieces have been assembled
- See visual instruction in the above video

Step 1

Step 2

Step 3
Hexagon Star 2 – Design Ideas

2-coror model

3-color model
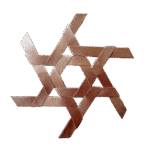
Single Color model

Multicolor Model
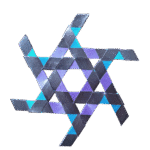
Multicolor Model

Multicolor Model
What’s Next
Now that you’ve completed flat models you can move on to more complex 3D models.
